

 +1 727 756 1632
 reachus@velan-bookkeeping.com
Transitioning from QuickBooks Desktop (QBD) to QuickBooks Online (QBO) is a popular topic for many businesses that wish to have flexibility and the ability to work from anywhere and collaborate more easily. QuickBooks Desktop is powerful, but it restricts you to one device, unless you routinely fork over money for hosting. In contrast, QuickBooks Online empowers you to run your finances from anywhere, anytime, and receive automatic backups and updates.
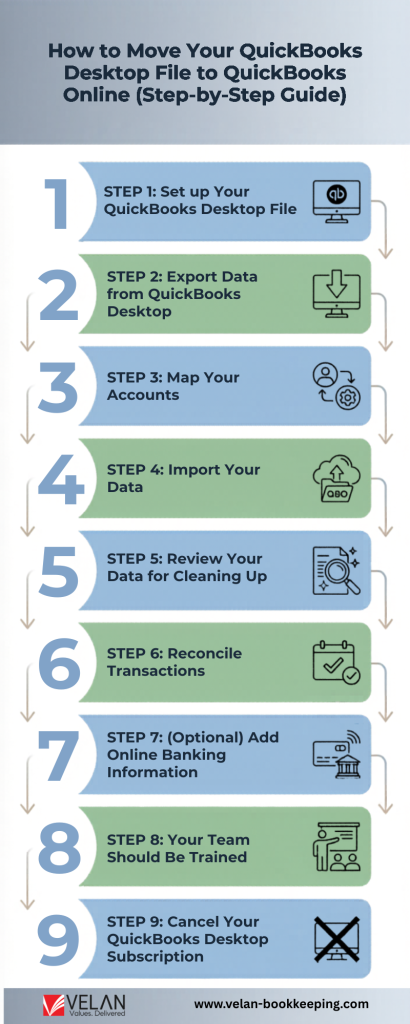
How to Move Your QuickBooks Desktop File to QuickBooks Online (Step-by-Step Guide)?
Step 1: Set up Your QuickBooks Desktop File
Step 2: Export Data from QuickBooks Desktop
Step 3: Map Your Accounts
Step 4: Import Your Data
Step 5: Review Your Data for Cleaning Up
Step 6: Reconcile Transactions
Step 7: (Optional) Add Online Banking Information
Step 8: Your Team Should Be Trained
Step 9: Cancel Your QuickBooks Desktop Subscription
Migrating your data may seem technical, but with the right steps, you can make the move confidently. This guide breaks the process into simple stages so that you know exactly what to expect.
Note: Before starting, back up your QuickBooks Desktop company file. You must also ensure that your file is error-free—otherwise, the migration will import incorrect or incomplete data.
Step 1: Set up Your QuickBooks Desktop File
Do you have an error-free and duplicate-free company file?
Have you upgraded to the most recent desktop version?
The first step is ensuring your file is clean and ready for migration. Open your QuickBooks Desktop, run a data verification, and resolve any errors that show up. If you have old vendors, duplicate accounts, or inactive customers, clear them out to avoid cluttering your QuickBooks Online.
A clean file ensures that your financial data transfers correctly, saving you time during post-migration cleanup.
Step 2: Export Data from QuickBooks Desktop
Do you know where to access the export option?
Have you signed into your QuickBooks Online account?
Open QuickBooks Desktop, click on the File menu, go to Utilities, and then choose the option to export your data to QuickBooks Online. When asked, sign in with your QuickBooks Online user ID and password. If you don’t already have an account, you will have to create one on your way.
The export tool will walk you through picking which QuickBooks Online company to send your data to.
Step 3: Map Your Accounts
Do your Desktop Accounts match up with QBO Categories?
Have you made sure there is a naming difference?
QuickBooks Desktop and QuickBooks Online might order the chart of accounts a little differently. That is, you will need to assign your Desktop accounts to the right categories in QuickBooks Online.
So, a Desktop “Bank” account may map a bit differently in Online. Carefully review the mapping suggestions, and adjust if necessary to ensure accuracy.
Step 4: Import Your Data
Are you migrating a small file or a complex one?
Do you understand this step may take time?
Once mapping is complete, you’ll move forward with the import process. QuickBooks Desktop will push the data into your online account. (How long this takes will depend on the size of your company file and the complexity of your transactions—it could range from a few minutes to a few hours.)
Wait, don’t interrupt the transfer process.
Step 5: Review Your Data for Cleaning Up
Is that what your chart of accounts resembles?
Do the balances match what was in your old QuickBooks Desktop reports?
And remember to review your new QuickBooks Online company after you import. Look at:
- Your Chart of Accounts
- Customer and vendor lists
- Invoices, bills, and payments
- Financial reports (e.g., Profit & Loss and balance sheets)
Making sure no data gets lost or mishandled is the main objective. Should you encounter any errors, you can choose to correct them in QuickBooks Online, or you can try the migration process again if necessary.
Step 6: Reconcile Transactions
Have you performed a reconciliation in QuickBooks Online yet?
Does the balance match your latest ‘desktop’ reconciliation?
The next thing you need to do here is Reconcile your bank accounts and credit cards. This keeping of statements makes your transactions in sync with the real bank statements. Compare your adjusted balances in QuickBooks Online with your bank statement ending balance in Desktop.
This is a vital step to make sure that your data is based on facts.
Step 7: (Optional) Add Online Banking Information
Did you ever utilize bank feeds in QuickBooks Desktop?
Would you like specific transactions to be automatically imported into QuickBooks Online?
If you currently use bank feeds in QuickBooks Desktop, you’ll need to set them up again in QuickBooks Online. Just link your bank and credit card accounts, and QuickBooks Online will automatically download transactions as you go. This is a time-saver and eliminates the need to manually type.
Step 8: Your Team Should Be Trained
What level of experience does your personnel have with utilizing QuickBooks Online?
Will they require training to adapt to it?
QBO is not at all like Desktop. If other employees are already using QuickBooks, show them how to log in, create invoices, record their expenses and run reports.
Providing even a short training session can help avoid mistakes and speed up adoption.
Step 9: Cancel Your QuickBooks Desktop Subscription
Reverified the accuracy of your QuickBooks Online?
Have you backed up your old Desktop Company file?
Once you have complete confidence in the accuracy and integrity of your information, then you can cancel your QuickBooks Desktop subscription. But save a copy of your Desktop file so that you can refer back to it later.
Final Thoughts
Converting from QuickBooks Desktop to QuickBooks Online is more than just transferring over old data—it’s about moving to an accounting system built to better meet the needs of today’s businesses. However, with a little work preparing your file, working through the migration process, and verifying that your data came through intact, it doesn’t have to be a high-stress experience!
If the idea of doing any of this sounds daunting, you can always hire a QuickBooks ProAdvisor or reach out to Intuit’s support team. They also know how to search public documents and databases without making mistakes, so your data gets where it has to go without anyone knowing.
FAQ
When will the migration be complete?
How big and complicated your company file is will determine that. For smaller files, the migration may only take a few minutes, but larger or older files with extensive history can take several hours to complete.
Can everything from the desktop be moved online?
Most of your data will be carried over, including your chart of accounts, customers, vendors, and transactions. But some reports, custom templates, and the audit log may not move over in the same way they look in Desktop.
Do I have to quit using QuickBooks Desktop right now?
No. You can keep using Desktop until you’re certain your QuickBooks Online file is correct. So, if and when that is confirmed, use Desktop in front of your subscription.
Do I have to have an accountant perform this migration?
No, although if you’re not tech-savvy or you have a large file, we recommend hiring a QuickBooks ProAdvisor.
Offshore Bookkeeping Services